Showing posts with label tutorials. Show all posts

Friday, 17 April 2015

THE SIDEWAYS-NO-BACK-COMB-VOLUME-SWIRL


Sometimes ago (a rather long time ago actually) I promised a hair tutorial on how to add a little volume on top by rolling your hair in a sideways swirl. And then I went trough some issues with losing all my images (and recovering them) and then updating my computer and getting some plug-in-issues with my editing software...so it's been a long journey, but, here we are and here's the how to:

Apart from a brush and a comb you will need hair pins, a few clips for when working on your 'do and part of a hair rat / donut. 

Grab one of those hair donuts (that you can find pretty much anywhere) and cut it open into a roll. Cut the top layer open so you get to "un-roll" the roll. Cut a suitable piece of mesh to use as a fill for this do. You can use the thinner roll that is left over for example rolling a faux bang or so (it actually works better that way, when it is not too 'chunky'.) You can also use tulle as a fill, but the mesh is easier to work with.

 As usual, this works best on "yesterday's curls". Or then put in some hot rollers or similar for a little texture. As always it is easier to work with your locks when they have a bit of curl to them, and not just swish-swosh lots of independent straight slippery strays of hair.

Part your hair from ear to ear in a semi-half circle or a straigh line, depending on how your hair works best. I do more of a half circle. Use a rat-tail comb for a straight line; I often separate my hair with the tip of an alligator clip (because it is apparently such a big job to get the comb out of the drawer). Gather the section on top of your head and secure with a clip for now.

Take out the net you just cut from the roll and place it just on the line where you separated your hair. Attach it with a couple of pins. You can fold and push this a bit in place then.

You can make this do without any fill; it works just as well. But you get a litlte extra height from this, and my swirl stays better in place against the mesh.

Brush out the hair on top of your head.

The next step is optional; I do this because I have lots of shorter hairs that easily fall out of my swirl-Separate a strand of hair just above your ear on the opposite side of where you want to lay your swirl.

Attach it with a pin or two back in the middle. If you have lots of shorter hair you can do this on the other side of your head too; you'll notice this when you start to roll your swirl. This also depends on your hair day; in between washes and with the right amount of curl my hair sometimes stay together well.

Then start rolling your swirl! Lift the section above your head and start by rolling straight downwards and then towards your head. You can put a clip in the middle to keep shorter hairs from falling out as that can sometimes be an issue for those with longer hair. Keep a firm hold of the hair you are rolling and make sure the end does not peek out.

When you get close to the head, flip the roll over to lay on one side.

Secure it with pins in the middle. You can stick a pin or two in from underneath the swirl as well.

Carefully smooth your hair out from the swirl towards the other side of your head. Also gently push the swirl upwards and tuck it a bit in from underneath; make sure the mesh is covered. Stick in pins where needed.

Grab your rat tail comb (or clip) and carefully pull the hair on top a bit upwards for more volume, and also to even out the height; before you do this your hair will be a little higher on the side where your swirl lays (since there is more hair there).


Then brush out the rest of your hair and curl the ends of you so like and roll your bangs if you have such.

And you're done!

For variation put the rest of your hair in a ponytail just underneath the swirl and tie a ribbon around the ponytail, or twirl some hair around the base (like in the picture).

Or, attach a faux ponytail of good quality (fibres) - I jsut clip it on top of my poinytail -for extra huuuuge hair!

You can also use the sideways swirl in an updo but we'll look back on that another time!


Wednesday, 5 December 2012

THE 1960's BIG TWIRL UPDO(S)


Mammoth (as in massive) hair post coming up!


I had many people asking me for a how-to on the hair after this post, where we went to the sixties party.
I only feel comfortable doing tutorials on styles I actually sport a lot and are familiar with, and this was the first time I did an attempt to this particular up do, and it was tricky. But lathe past year I've been oozing for big hair and huge buns to be worn in a more every day style than just with a gold lamé dress. And I've developed a couple of styles  that are rather fast and relatively easy too.

Here's a couple of variations on the 'do in a more everyday fancy-and another one in more evening style:

Like this!
I've been doing this style a lot during autumn.


And this! Ooh-lala fancy shmansy party hair. December is party season you know.

You obviously need some extra hair of good quality for these. Unless your hair is a meter long or so. Which is a totally different thing and tutorial and yes yes bla bla. My hair pieces are of kanekelon fibre which feels and looks very real.

Here's the how-to:
(You can click the multi-images for a larger view.)


For the first one you will need a long ponytail of with claws, some filll; a hair doughnut or a rat -you can make your own with some back combed (cheap) extensions and a hair net for example- and pins.


First, choose your parting and how you want to keep your hair in the front - drawn back, a fringe, loose on the side, pincurled or so.

Pull your hair back into a french twist. I make mine rather simple, just roll and twist it tightly to one side. I think it works with both a sleek or a bit of a messy-lot-of-back-combed hair twist, depending on the occasion. It does not have to be perfect on top, as it will be covered by the bun. Avoid sticking too many pins in at the top, as you want to attach the pony tail there. 

HereI comb my fringe to the side and tuck it in the twist. I put in two pins crossing each other closest to the neck, to keep the shorter hairs from falling out.


Time for the pontytail! I happened to find one that is exactly my hair colour.
Instead of putting it in like it's supposed to you will put it on sideways (like I did here last summer).


Clip it on at the top of your twist, grabbing both hair rom the crown of your head and the twist with the claws. (If your ponytail is without claws you can add it after the retardo-step below; pinning it to the donut/fill.)


Ta da!

Then, place the rat/doghnut on the top of your head. It should stay put with one pin on each side. You can use the fill like this, rounded or rolled, or place it along the claw of the ponytail more like a sausage. (You can skip this step if you want your up do a little less chunky.)


Retardo-phaze.


Then, depending on in which direction you roll your bun, put a bobby pin on one side of the ponytail - I roll mine counter clockwise, so I put the pin on the right side. Just fastening the pony tail to the head. This is so that it won't make a gap when rolled to the side.

Take the hair and roll it over your head and the hair fill to the other side. As you see your ponytail needs to be quite long for this to work. Pin on the other side. 


Roll the end into a curl, or tuck it in under  itself if you can't get it neat.


Smooth out evenly over the hair fill and along the sides. Put in a few pins on each side and one or two trough the swirl on top into the hair fill. It should stay in place quite well with just a few; mine stayed well even in nasty October weather!


And that's it, we're done!

Quite simple and versatile as the look changes quite much according to how you keep your hair in front.


For the other version you will need pins, a comb and a fill plus a hair piece without claws or strings.
And some attachable bling.


I have "declawed"  my ponytail; taken the claws out.
You can also use pretty much anyshorter wig for this. It might work with some clip on hair too.


For this version I pulled all of my hair back into the french twist, which I rolled more slanting across the head than straight. You can also make a little bun on top of your head instead of rolling it into a twist, but for me my hair never stays nice and sleek in the back that way; it always falls out in the neck. I also find it more festive with a twist than with it just pulled upwards.


Then, add the hair fill on top of your head, as high as possible - Retardo mode again.


Put the hair piece on top of the fill,  scure it by sticking a comb in.


Ta-ta! for this one so far.


The next step depends a little on what kind of hair you used. If you had a ponytail like me or a shorter wig, just gahter the hair together, twist it a bit to one side, forming a curl, and then pin. Or tuck it in under the bun if your curl won't form.

If you have a longer piece you roll it more in a loop/bun. You can use a net over it in that case. (In my sixties pregnancy style post I did it like that; rolled it a couple of times inwards and pinned, put a net on. I had a rather long wig of more cheap quality in that version.)


Sleek out the sides, tuck in some pins if needed. Watch out so that the pins don't make gaps in your hair though.


There you have it!


Decorate your 'do with a sparkling pin or comb either in the front Hepburn style or place something sparkly in the back swirl!

Now you're ready to part-ey!

Thursday, 14 June 2012

TIPS AND TRICKS FOR AN EASY 'DO


As promised, I will let you know how I made the apple blossom hair do!

It's very simple and probably something many of you have done before in similar versions.
It's good for that last day before you need to wash it, as it stays easily put that way.

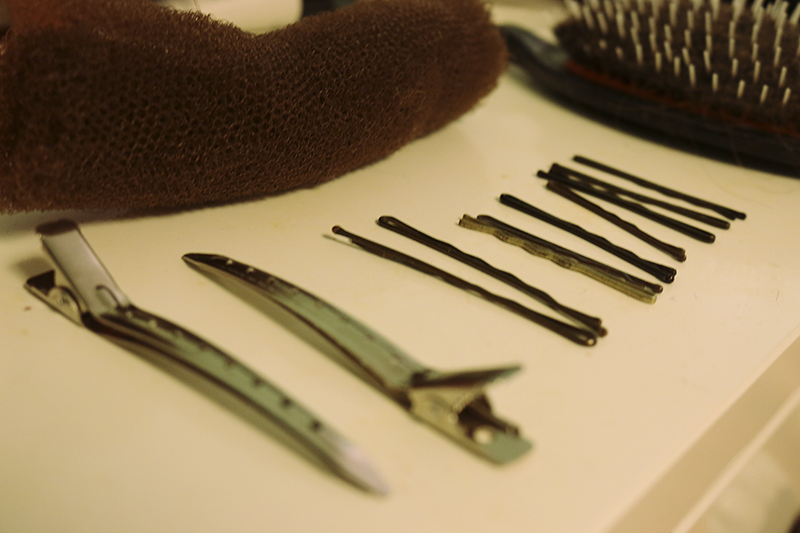
First, let's take a look at it again, because as I said here just before, you can learn a lot just by looking at what it is you want to remake:

(You can click for a bigger view)
However, not everything is revealed here just by looking - which is the point of some hair do's, as is it with this one. My hair is now at the shortest it has ever been, which makes it hard for it to "stay put" when I try to fasten it. Pincurls have to be rolled in mini size in the back, too small to look good in an updo. My hair won't fit neatly around a rat, or stay in a ponytail without pinning it on the side. Depending on the day I might need extra pins for the shortest hairs in the neck, which ruins the sleek look of a roll or bun. Also, the roll turns out rather pjunig, tiny, since m hair is so short. Here's where the accessories come in handy - they can not only be used to enchant the 'do, but to cover up some of the extra work that needs to be done!

In general, a good tip for a easily achieved fancier-than-it-actually-is look that works for as well long and short hair, is to concentrate on your hair in the front and just gather the hair in the back and cover it with something nice.

This trick is good for you if you
a) have very short hair
b) are not skilled enough to do your hair in the back (as in, turns out uneven or messy - not good!)
c) have a lack of time

I do a lot of burlesque themed bachelorette workshops where I style the bride to be or the whole group, and this comes in handy then.
(Ehrm,  btw: I'm available for such at the end of summer again. Just sayin'...)

In short, it works the following way:
1) style your hair fabulously in the front - rolled bangs, rolls, pincurls, the choice is yours.
If you suck at styling, try to learn at lest one thing that will work for you. You can do it!
2) make a quick and simple bun or chignon in the back and pin well for it to stay
3) cover the hair with lots and lots of decorations. Something simpler like a scarf or bow or one big flowers will be good for everyday wear, while more glittery and colourful flowers puts your head into party mode!

(Note: not that there's anything wrong with a sleek bun or so either, it can be very beautiful and elegant, but this was for when you are in a hurry and might not have the time to make it all that nice. Or if you were not capable to do it in the first place. Hehe.)


If your hair is super short, roll up or wave it in front and just pin all the rest together in the back and cover it with as many flower pins and -clips as you can fit! You can curl very short hair in the front nicely too, I have done it to ladies, so it's possible. If you can't manage anything, pin smoothly to the side and put in a flower there too. Ta-da, up do feeling achieved!

But now, back to the actual apple-blossom do, which pretty much follows the steps above and also gives a feeling of slightly longer hair.

The beginning is done like my very first hair tutorial (<- link); you start by parting your hair either in the middle or to the side. If you have bangs, let them hang in front or roll them in the way you prefer.


Take the hair in front from just above your ear and twist it half, or one way, around itself.  If you have bangs that are long enough and want them away from your face you can grab them along. If your hair is very thin and/or slippery hair you can tease the hair a bit for volume and stay. Otherwise you can get it very big and high just with the help of the combs.


Secure the section with a comb, pushing it slightly forward for height. You should always twist the comb a bit and never stick it straight in, it won't stay put that way (unless it is just for decorative use and you stick it straight down in a chignon in the neck or so).. Put the comb in from above and then turn it the same way as your head, or, depending on your hair, you put it in sideways and give it a 180 degree turn. I use a shorter comb for the side of the smaller parting.


Take the hair behind your ear along the neckline and twist it in and upwards a couple of times, towards the middle of your neck.
Don't roll it all the way to the middle though, as then your shortest hairs will start falling out -  I stop a little bit after the ear.


Secure with a firm bobbypin pushed inwards.
If you feel you need it, put another pin across the first one.


Next, we get to the rolling: grab the hair that's now gathered in the back and roll it upwards in a small roll. I use both hands in the beginning, and roll the hair around the index finger of one hand. You can let go with the other hand once the roll starts to be in place (well, obviously you also have to, unless you have a third hand available for pinning...)


Secure the roll from the side. I usually use one alligator clip per side, that I grab all hair from the the scalp and the roll with. You can also use two bobby pins per side.  Carefully pull out the roll a little to cover the clips or the pins. Spray and sleek the roll with your hand from the neck upwards.


If you are having a slippery hair day, you might have to do this a couple of times to get it right. Teasing the hair a bit, or adding some spray can help. If your hair is a bit longer you can of course use a rat or a piece of tulle in this phase too.


If you have small loose hairs pin them carefully underneath the roll. Spray some more. You might also have to add a few pins to the top, if your hair is so short it keeps falling out. Just stick them in and spray, they'll be covered by your acessorie in the end...

...which actually comes now already, as we're pretty much done!


Take your chosen accessory and fasten it just above the roll. For this I would recommend flowers that are on pins or clips, not combs. Put in as many as you want. Done!


The roll can, although a bit small, still look nice un-covered too, those days it will stay easily together withouth too much extra pinning. For more a casual look I then do this one with a flat or sideways standing big pincurl in front, and a scarf around my head. The scarf stays well in place under the roll (and covers any extra pins in the neck). I pin the scarf with one pin on each side of the head for comfortable stay.

There you have it (quite a lot actually)!