Showing posts with label kauneus. Show all posts

Thursday, 24 March 2016

PASTEL-LY HAIR


It's been half a year already since I coloured my hair already but I'm still not sure what shade it really is. Peachy-something. It does require some work to maintain - or well, a lot of bottles at least - and it looks a bit different after every wash, depending on which bottles were involved. (If I've been a bit too eager I end up with my little pony hair but when just right it gets this powdery soft pink peach shade.)

At first I mixed some crazy colour with my conditioner (strong pink and soft lavender) but then the shade woudl wash away completely the next time, unless the colours were added again. Now I've been using Biozell's caring color masks,  both raspberry, plum and silver mixed with conditioner. They stay in the hair a bit longer, altough I still use them pretty much every time. (I've bought all these myself. No-one has sponsored me with anything here. Sadly. Heh.)

At first I thought I'd only go for this for a little while but I kind of get addicted to trying to achieve the right shade... My hair is doing quite well still, and I still have all the coloured hair masks left so I guess it (the colour, that is) will hang in for at least as long as they last. Heh heh. And as the hair looks different from wash to wash one does not get bored. Heh again.

But... on all on-stage photos my hair looks blond anyway. Hmpf.

Sunday, 3 January 2016

FAUX PIGLET BANGS AND A BUNCH OF FLOWERS


 Some time ago I went to a tropically themed Christmas party with a definite chance to go for a more-is-more kind of styling. I haven't had my hair in bangs, not real nor faux, since I coloured it; in fact, I gave myself the permission to colour only if I'd grow out my bangs. Because you can't have two hair struggles at once (grow out or not, to colour or not to) and that was one way to get a decision done. Plus I  though soft pink or peachy bangs might make me look like a piglet.

But turns out the result was more just regular retro-hair-style-gal than Miss Piggy after all.

The colour really is quite the task to keep up with though, and it looks a bit different after every wash as I need to mix a few tinted hair masks to make it stay. I do like it, but not sure how long I'll have the energy to keep it up. Might have to give mint green a go in the end -well of course- before going back au naturel ;) But everything is really easier to do, hair styling wise, when you have a little (or a lot) of bleach in you hair.

The green dress was made by me for my middle sister's  wedding a couple of years back but has only been used a few times since. (I was breastfeeding at that time and the dress was made to the upper measurements of that period so it does not sit as well now...) The flowers are also selfmade from some years back.

And the party, well yes,  it of course had a little mini christmas tree with lots of sparkly flowers in it. And lots of flowers in everyodys' hair.


Wednesday, 14 October 2015

PASTEL PEACH MEETS STRAWBERRY BLONDE


It's already been a month since I coloured my hair but there hasn't really been many pictures of it yet, but now I've almost already forgot how it looked before. But here it is, a pastel-peachy straweberry blonde rose gold shade! That is also really hard to get to show right on photos. (And to keep up.)

Those who have read my blog a long time (thisblog turned eight years around last week, can you believe that, eight!? That's a very long time.) know that I used to be blonde for many years (with some pink addition in the very end) before I had to give up on the platinum. My hair had turned so bristle and thin from all the bleaching and purple shampooing I had to do something about it, and back then it felt like a big thing because I had been blonde for so many years and also felt it was a big part of my stage character. Thus my "hair project" began to get my hair healthy again; I started colouring it closer to my own shade and growing the bleached parts out (eventually cutting it short in between). As that project has been 'completed' for some years now -my hair grew out strong and annoyingly healthy (especially after the herb colours) and thus much harder to style and curl - I guess it was time to turn it around and start damaging it again... Of course.


It took two visits to the salon (I go to Pinkki Paplari) with a few days of a not-to-be-seen-in-too-many-photos kind of in between-shade (as in the picture with the braids). We did bleach it with Olaplex in the mix, which should make the bleach less harmful on the hair.


t's quite a big change going from all-natural hair care to 'needs-a-lot-of-maintenance'-hair. But it was a thought I got into my head, pastels, (again, I have always had a thing for cotton candy hair, even though I didn't go all the way now) and  I couldn't get rid of for a few very intensive days when I also had a chat with my hairdresser who got all worked up too and when I then all of a sudden I had booked an appointment. But as the waiting time was long and as I actually really like my own colour as well, I started thinking of all the work (and money) involved with keeping a hard-to-maintain shade,  so when I got to the salon I hade decided bail out and just go a little lighter and more intense in colour with some herbal shades on instead. But alas, peach happened anyway!

So my hair is now something of a half pastel half natural shade!
(Me to Eddi: "this could almost, you know, almost-almost pass for natural, right? " To which he replied with a simple "No".)

It does change a bit after every wash and requires colour masks to not just turn a golden blonde (read: yellow). And even though the olaplex-treatment may have helped the hair from getting too damaged it is still dryer now. Which in fact is a good thing as I am growing out the bangs, as it is easier to style them away now and they stay in place. Wooh! And also, curls stay longer, going on day four in the pictures. Yeeey.


Thursday, 18 June 2015

RED AND POINTY


 My favourite manicure is by far the pointy french one in different shades of red.
I'm not sure if there is a more official name for it but 'pointy french' is the one I go with.

It is actually very easy to make - just two strokes of varnish drawn from each side of the nail and up to the top. Even manageable to do with the weaker hand.

Or you can draw the lines more round, to get heart shaped tips (there's a lot more going on with my nails here in this pic but ignore that).


If you want to fancy it up, make small dots in a metallic shade along the line.


Use a thick varnish with good coverage that is not too runn. Make the small dots with a toothpick, hairpin or needle for application.

The deluxe version would be small rhinestones, but I leave it to the salon for that.

Friday, 17 April 2015

THE SIDEWAYS-NO-BACK-COMB-VOLUME-SWIRL


Sometimes ago (a rather long time ago actually) I promised a hair tutorial on how to add a little volume on top by rolling your hair in a sideways swirl. And then I went trough some issues with losing all my images (and recovering them) and then updating my computer and getting some plug-in-issues with my editing software...so it's been a long journey, but, here we are and here's the how to:

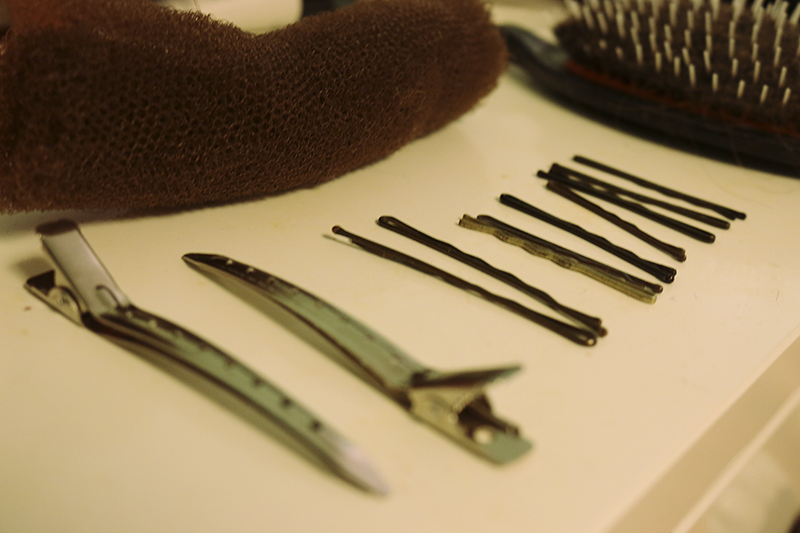
Apart from a brush and a comb you will need hair pins, a few clips for when working on your 'do and part of a hair rat / donut. 

Grab one of those hair donuts (that you can find pretty much anywhere) and cut it open into a roll. Cut the top layer open so you get to "un-roll" the roll. Cut a suitable piece of mesh to use as a fill for this do. You can use the thinner roll that is left over for example rolling a faux bang or so (it actually works better that way, when it is not too 'chunky'.) You can also use tulle as a fill, but the mesh is easier to work with.

 As usual, this works best on "yesterday's curls". Or then put in some hot rollers or similar for a little texture. As always it is easier to work with your locks when they have a bit of curl to them, and not just swish-swosh lots of independent straight slippery strays of hair.

Part your hair from ear to ear in a semi-half circle or a straigh line, depending on how your hair works best. I do more of a half circle. Use a rat-tail comb for a straight line; I often separate my hair with the tip of an alligator clip (because it is apparently such a big job to get the comb out of the drawer). Gather the section on top of your head and secure with a clip for now.

Take out the net you just cut from the roll and place it just on the line where you separated your hair. Attach it with a couple of pins. You can fold and push this a bit in place then.

You can make this do without any fill; it works just as well. But you get a litlte extra height from this, and my swirl stays better in place against the mesh.

Brush out the hair on top of your head.

The next step is optional; I do this because I have lots of shorter hairs that easily fall out of my swirl-Separate a strand of hair just above your ear on the opposite side of where you want to lay your swirl.

Attach it with a pin or two back in the middle. If you have lots of shorter hair you can do this on the other side of your head too; you'll notice this when you start to roll your swirl. This also depends on your hair day; in between washes and with the right amount of curl my hair sometimes stay together well.

Then start rolling your swirl! Lift the section above your head and start by rolling straight downwards and then towards your head. You can put a clip in the middle to keep shorter hairs from falling out as that can sometimes be an issue for those with longer hair. Keep a firm hold of the hair you are rolling and make sure the end does not peek out.

When you get close to the head, flip the roll over to lay on one side.

Secure it with pins in the middle. You can stick a pin or two in from underneath the swirl as well.

Carefully smooth your hair out from the swirl towards the other side of your head. Also gently push the swirl upwards and tuck it a bit in from underneath; make sure the mesh is covered. Stick in pins where needed.

Grab your rat tail comb (or clip) and carefully pull the hair on top a bit upwards for more volume, and also to even out the height; before you do this your hair will be a little higher on the side where your swirl lays (since there is more hair there).


Then brush out the rest of your hair and curl the ends of you so like and roll your bangs if you have such.

And you're done!

For variation put the rest of your hair in a ponytail just underneath the swirl and tie a ribbon around the ponytail, or twirl some hair around the base (like in the picture).

Or, attach a faux ponytail of good quality (fibres) - I jsut clip it on top of my poinytail -for extra huuuuge hair!

You can also use the sideways swirl in an updo but we'll look back on that another time!


Monday, 9 February 2015

A LITTLE WOLUME ON TOP


 I don't like to tease or back-comb my hair. When setting my hair with curls it gets enough volume for what I normally am after, but sometimes when I want something more of a bouffant I go for hair fills rather than teasing. But not all hair fills are the perfect solution either, as I often feel my hair keeps sliding off or forming gaps in the middle.


But you can of course also get some volume into your hairdo by how you choose to lay your hair - this sideway-swirl-do gives some height by itself. You can then add to it by using just a little fill (which also makes securing the 'do eaiser) that will stay well in place.

We'll get back to the how-to in another post really soon, along with a good hint for a light and easy hair fill. But - if you'd like to learn how to roll it live, plus get some other small tips and trix when it comes to different vintage inspired do's,  I am throwing a 2-part vintage inspired hairstyling workshop next weekend!

The workshop is held in our studio in Lauttasaari on Friday evening (the 13th) and on Saturday the 14th in the day with setting the hair in the evening and brushing it out and making hairdo's the next day- fancy hair for Valentines Day! Held in Finnish, also English or Swedish if needed. See the event page for more info and how to sign up: Set those curls & style your locks!

Saturday, 1 November 2014

HA-HA-HALLOWEEN NAILS!


Here's a little silly instagram video of this month's manicure that I forced my dear husband to film.
Note that is has extra zombie-moster sound effects in the background improvised by my two-year old son. Family project!

I have tried out a couple of different shades of a colour changing gel polish this fall (not at home, at my salon) and I am excited like a child about how my nails shift in hues and colour (darker when cold and lighter/brighter when warm)! Variation for the win. This manicure in honour of Halloween goes from a sparkly red to a sparkly purplish-black.

Oh, and,  not to forget: Happy Halloween!


Wednesday, 1 October 2014

PINKKI PAPLARI & NATURAL HAIR COLORING


The other week I went to the hairdresser's. Which is kind of an occasion, as the last time was in March 2013. In between I've just had to rely on a couple of mirrors and scissors in my bathroom.


I go to a place called Pinkki Paplari (the "pink roller"), which is a vintage style hair parlour that coiffures both men and women and that will make any crazy rad punk coloured styles you may want as well, but the main thing (for me) is that it is also an organic hair salon, meaning you can get all-natural treatments there as well.


The salon moved to a new location in Tölö late last spring. The old parlour was in red and pink, but the new one is mint green!

Fabulous owner Anita is a friend and burlesque student of mine. (And btw her hair is naturally wavy; she doesn't even have to curl her bangs!!. Now how jealous that does make me!)

We had talked about doing a natural hair color mask for me to get some warmth back into my colour and brighten my shade -it has turned more dull the past year, age does not come alone as one says in Finnish - ever since my last visit. now we finally got the time to try it out. I've done lemon-and-camomille washes and such but never really tried to color my hair with herbs and plants before.

Paplari has lots of nice photofriendly retrolicious and fun small details.

Not to forget the misters as well - Pinkki Paplari just started with beard & shave workshops for men btw.


In the back room the brightening parts for my color were soaking in - camomile and marigold (calendula).


A range of colorants in jars. You have alder cones (I remember colouring yarn with alder in the art club when I was small) and walnut for brown and dark shades for example, avocado pits and hibiscus for reddish tones and so on.  It's interesting to see the ingredients, some may come as surprises (like the avocado) while others are more obvious (the henna, and indigo for jet black).

You can get a wide range of shades depending on what  you mix together and how; in general Anita makes the colours one by one for each colouring. You can't bleach hair naturally though (although, a little btw from a poison-point-of view; bleaching is less bad for you than colouring your hair darker, although it will dry your hair) but you can brighten it's tone and get a more golden shine to it, like we set out to do.


The soak was blended out with cassia for shine, and a little henna for a toffee like result. The cassia will also slow the henna a bit down. But that's it, nothing more than that!
I have a lot of hair and the mix is compact so when it was all in my head was rather heavy I tell you!

On with a compostable bag and a nice scarf and time to sit under the hood for some time!

With the company of organic snacks and some mags.

Then it was time to wash out the goo, give the locks a go with the scissors and dry and wait for the result!

Which turned out just right! Brighter and more toffee just like planned.

With natural colouring it's advised not to wash or soak the hair for a day or two, as the color will grow in intensity for a while and set. I had a little irrational feat that it would wash away once you wash your hair but it won't, it stays. As the tone is rather subtle there won't really be a harsh edge as it grows out.

Oh, and last: Pinkki Paplari is celebrating it's 9th year at Golden Classic Bar this Friday, starting at 21hrs!   The entrance to the event is free and among a bunch of bands our very own student group The Shangri-La Showgirls are also performing there!